GoPro Hero5 Fundamentals: Get in the know and get the shot.
While the GoPro Hero5 camera is one of the most simple and intuitive cameras on the market, it does have a wide variety of settings and features that when properly utilized will empower you to capture the most engaging content possible with the camera. This article will offer a fundamental understanding of how certain settings and features excel within different environments and can help you achieve your desired results.
Photo Settings
Single Photo, Single Photo Raw and Single Photo WDR – The only time I use single photo not in RAW format is by default when choosing a FOV that RAW is not supported in such as Linear View. Otherwise I always choose RAW as this is the optimal setting when shooting still environments such as landscapes with little to no action involved. It offers you two file versions for each photo taken, a standard .JPG and a .GPR. This is beneficial as the .JPG file can be edited on your phone for immediate sharing and the .GPR file offers the greatest control over post processing as it is supported by CAMERA RAW in both Lightroom and Photoshop. However if you are shooting action I recommend using one of the burst settings as it can be nearly impossible to capture the perfect frame with a single shot.
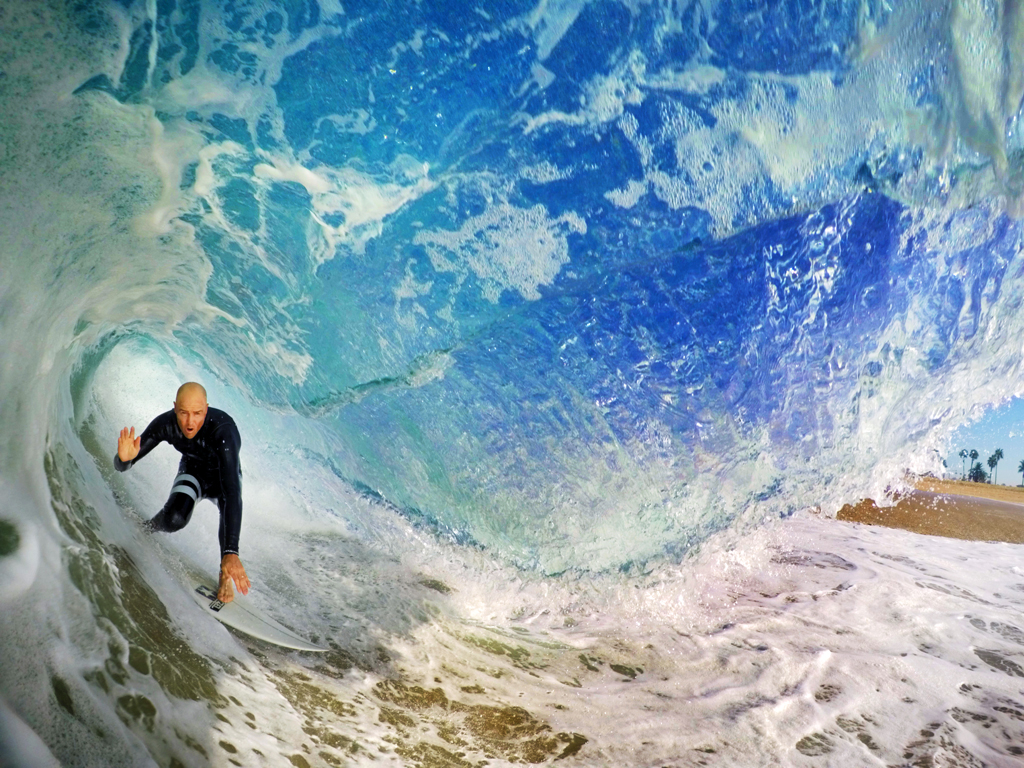
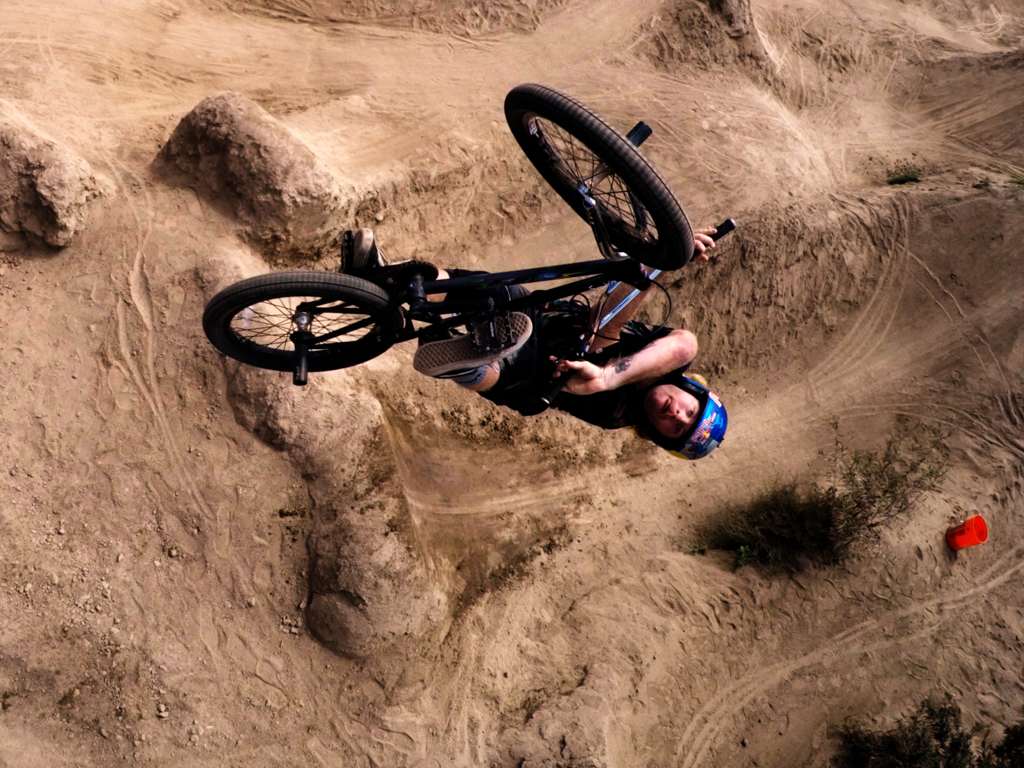
Burst Modes – Because the majority of what I shoot is action based content, burst mode settings are what I most commonly use. There are 9 different burst mode settings the Hero5 offers with frames per second (fps) ranging from (3 in 1) through (30 in 6) with the highest frame rate being (30 in 1). The common formula I use to decide which burst setting is best suited for the action I’m shooting is estimating the time span in which the desired frame will most likely occur and then utilizing the highest possible frame rate within the relative burst time span ensuring with the most probability that I won’t miss the desired frame. An example would be when shooting small waves that break in less than one second I’ll use (30 in 1) as I know the desired frame will happen within the one second burst span. Having 30 frames within that one second usually ensures that I capture the perfect frame every time. Then when the waves get bigger and I estimate the desired frame could happen within 2 seconds I’ll shoot (30 in 2) so that I won’t miss the desired frame because the burst sequence ends too soon. The reason I wouldn’t just shoot (30 in 3) when I estimate the time of action being 2 seconds is because the less frames per second you have the more likely you are to miss that perfect moment that lasts only a millisecond in time during face paced action. This same principle is applied to the variety of action I shoot so when shooting skateboarding if I estimate the desired frame will happen in with 2 seconds I shoot (30 in 2) or in BMX if I estimate the desired frame will happen within 3 seconds I shoot 30/3. Another variable that effects my decision in what burst setting to choose is situations where there are obstacles that can make it difficult to fire the burst at the proper time, for instance when you are blind to the subject. An example of this would be when I’m shooting from the bottom of a stair set that a skateboarder is going to do a trick down and the skateboarder isn’t going to come into sight until the burst should have already been fired but I can hear him rolling up. In this situation if my estimated time for the desired frame is within 2 seconds I might opt for (30 in 3) so I can fire the burst early in order to ensure that I don’t mistime the burst and miss the shot.
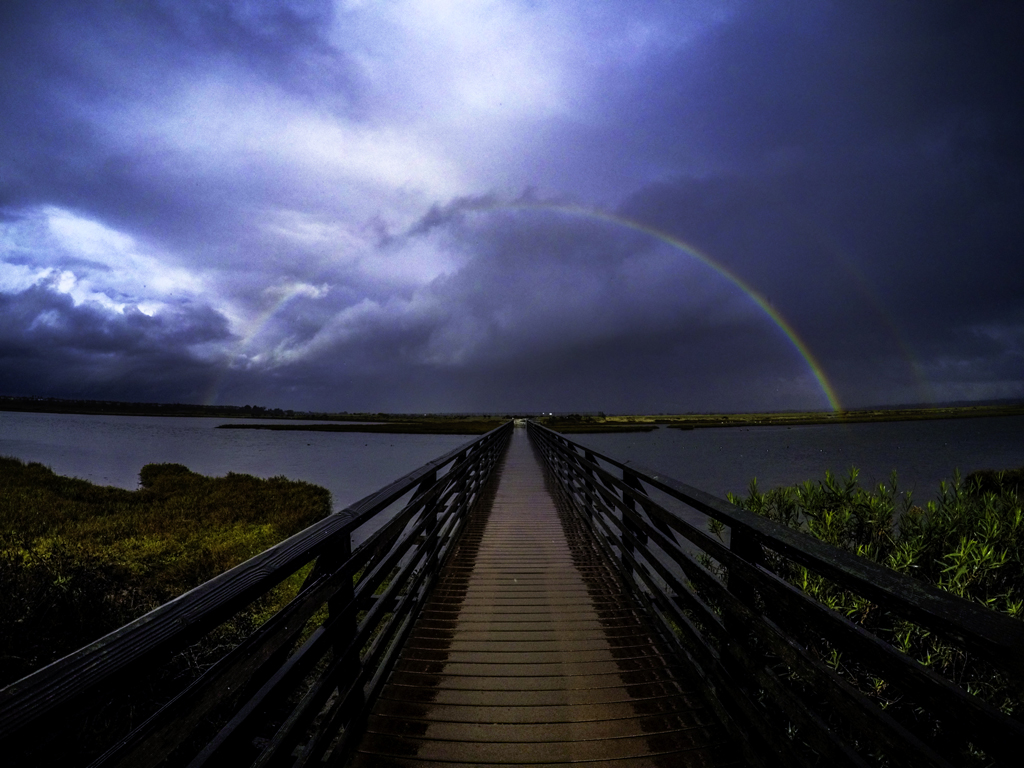
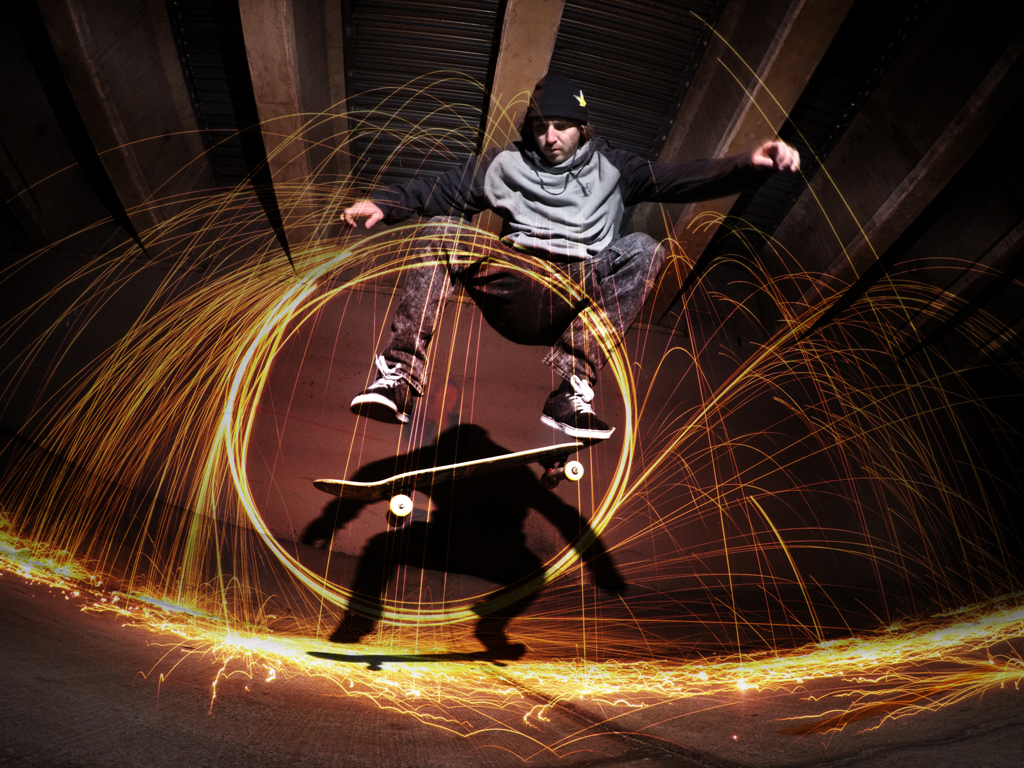
Night Mode – This setting offers the GoPro user the ability to do long exposure photography with exposure lengths ranging from AUTO ( The camera picks the exposure length it estimates is correct) to 30 seconds. Because of the slowed shutter this setting isn’t conducive to capturing movement without motion blurring unless you utilize a manually fired flash in order to freeze action. This setting is ideal however for capturing images at night of subject matter that is still such as landscapes, minimal static light such as stars or it’s also great for using techniques such as spinning wool to capture light trails. When using this setting you’ll want the camera to have a fixed location as any camera movement will create motion blur. This can be achieved by attaching the camera to any static object such as a tripod or resting it on a still surface. The ISO setting in GoPro’s Protune (Protune settings covered in artice below) also greatly effect the amount of light absorbed into the image. I recommend using the capture app when shooting night mode so you can view what you’re capturing and make adjustments to exposure time and ISO in order to capture your desired results. I also enjoy experimenting with artificial light such as a cell phone light, a flash light or a flash in order to illuminate subjects within the foreground.comr
Time Lapse Photo – There are two different ways to shoot a time lapse with the Hero5. One option is to have the camera automatically compress the time lapse into a video file (Described below under video settings) and the other is to have the camera shoot a series of photos that you can later import into GoPro Studio which will then convert those images into a time lapse video. While there is less post work with time lapse video, the reason you would possibly want to choose time lapse photo is that each image captured is a full res 12mp photo. So for example if you wanted a time lapse of an incredible scene but you also wanted a nice photo of it, you would opt for time lapse photo which would offer the best of both worlds. However if you weren’t interested in taking a high res photo from the scene you would most likely want to go with time lapse video to cut out the added time of post work. Time Lapse Photo mode has the same field of view (FOV) options as standard photo modes (See field of view below) and supports intervals from shot every .5 seconds to shot every 60 seconds. The simplest way to understand what interval setting is best for you is understanding the simple equation that you’ll need a total of 30 frames to equal one second of video. So a time lapse shot at an interval of 1 shot every .5seconds will need a total of 15 seconds to equal 30 frames, an interval of 1 shot per second will need a total of 30 seconds to equal 30 frames, an interval of 1 shot every 2 seconds will need a total of 60 seconds to equal 30 frames, and so forth. Which interval best suits you is dependent on how long you plan on shooting the lapse and how long you want the video to be. So if you wanted to say shoot a 60 second time lapse recorded over 30 minutes you’d want to shoot an interval of one frame per second. The equation being that with one frame per second you would get 60 frames per minute which would translate into 2 seconds of time lapse video compressed at 30 frames per second , so simply put with 2 seconds of time lapse video per minute it would take a total 30 minutes of recording time to equal 60 seconds of time lapse video. Something else that’s important when you shooting a time lapse video is you’ll want the camera to be fixed to a static location as moving the camera during recording creates undesirable results.
Night Lapse Photo – The Night lapse setting offers great potential both in capturing time lapses of night time scenes as well as continues shooting of long exposure images that’s great for capturing hard to time long exposure shots for example lightning during a storm. How this setting works is by continually shooting a series of long exposure photos with the ability to set exposure lengths between 2 and 30 seconds having intervals ranging from 4 seconds to 60 minutes between shots taken depending upon length of shutter. Like normal Time Lapse Photo mode this seting has the same field of view (FOV) options as standard photo modes (See field of view below) There is n.o option for automated video compression so there will be a basic level of post production necessary as you’ll have to import the image sequence into GoPro studio in order to compress the sequence into a video.
FOV (Field of view) settings – There are four different FOV settings available for photo mode. Wide, Linear, Medium and Narrow. I however choose to only utilize WIDE and Linear as Medium and Narrow are both based on digital zoom (cropping into the image). If I do choose to crop in on an image I prefer to do it in post as you have greater control over precision when it comes to composition. Wide is my go to setting as most of the action I shoot is based on close proximity to the subject. I do choose Linear mode when I want to step outside of the fish eye look and have less distortion equaling straighter lines without losing image quality. You can also achieve a straight horizon line when shooting wide if you center the horizon in your frame.
Protune settings Photo – Protune empowers the user to have manually control over several variables that effect image results.
- Color – This setting offers two options, GoPro Color and Flat. GoPro Color uses the default color profile that is offered when Protune is off and is what I often times shoot as it delivers great results. Flat is a raw color profile offering greater control during post production.
- White Balance – This setting controls what is known as the temperature of an image. With settings ranging between 3000-6500 as well as Auto and Native. The lower the number you use the cooler (more blue toned) your colors will be and the higher number the warmer (more yellow toned) your image will be. I mostly choose AUTO during normal lighting conditions as I’ve found this to achieve the best results however I have found the manual WB settings valuable when shooting long exposures at night to compensate when there is artificial light that is either too warm or too cold.
- ISO minimum and maximum – With the GoPro Camera I rarely push the ISO past 200 as I’ve found it can often times result in a blown out image so I most commonly shoot ISO Min 200 / ISO Max 200. The exception being when I’m shooting night mode and I’m wanting to absorb the maximum amount of light in which case I will push it all the way to 800. At ISO 800 be aware that there will be a considerable amount of noise.
- Exposure Value Compensation (EV) – This setting offers an added level of control over exposure and I utilize it often, almost always in the negative range. As I prefer to work from a darker image during post processing I commonly have my EV set to -.5 but I rarely push it below -.1 as it can cause undesirable noise.
- Sharpness – There are three levels of sharpness available (Low, Medium, High) As a standard I always shoot sharpness low as I prefer to add sharpness manually in post. However if you don’t do much post work on your images you might want to try Medium or High.
Video Settings|
The Hero5 is a powerful tool for capturing stunning video. What you’ll need to know is the proper combination of settings in order to achieve the best possible video of the environment you’re shooting for the platform (Instagram, Facebook, Youtube) you plan on sharing it on. The combination of settings will include Mode, Resolution, FPS (frames per second), FOV (Field of View), Shutter, and Protune Settings.
Modes – There are four different video modes on the GoPro Hero 5
- Video – This is the mode you’ll use for shooting standard video
- Time Lapse Video – This is for shooting a time lapse and having it automatically compressed into video. It uses the same principles as mentioned above in “Time Lapse Photo” but cuts out the post work of having to manually compress the image sequence into a video using GoPro Studio.
- Looping Video –
- Video + Photo – This offers the ability to shoot video and time-lapse photos simultaneously with the photo interval ranging from shot every 5 to 60 seconds. However I rarely use this feature as it only allows Resolutions/FPS up to 1080p@30fps or 720p@60fps. It does still support Wide, Medium and Narrow FOV. Even though this feature isn’t conducive to the content I normally shoot it could be a powerful feature for someone who isn’t interested in the highest resolutions or frame rates and wants the best of both worlds.
- WVGA – I only choose this setting when I’m shooting for the specific purpose of sharing content slowed down to the lowest percent possible (without losing fluidity) on Instagram as it isn’t HD. However for Instagram specifically this setting is epic for ultra slow motion videos.
- 720p – With 720p and 1080p both sharing the same highest frame rate possible (120fps) I rarely choose this setting in Wide FOV as I prefer to always shoot the highest resolution possible for the post production benefits. I do however shoot 720p Narrow View quite often (See FOV below) because it supports 240fps for the highest quality slow motion.
- 960p/1440p/2.7k 4:3 – These three settings all share a 4:3 aspect ratio in contrast to the 16:9 shared by the other resolutions. This means there is greater area of visibility on both the top and bottom of the frame. This comes in handy especially when shooting POV or during times where framing a subject can be difficult allowing greater room for error which can then be properly framed in a 16:9 ratio composition during post. Which of these three settings you’d want to choose is dependant upon the resolution of the project you’ll be working in as well as the importance of higher frame rates for the purpose of slow motion.
- 1080p – As I normally work in a 1080p composition when editing this is my go to setting unless I’m utilizing a higher resolution for post production purposes. It offers the capability to shoot 120fps which is good for slow motion and is full HD.
- 2.7k/4k – Like I mentioned prior because I normally work in a 1080p project I usually only use these two setting when I want the ability to crop or use other techniques during post. As long as properly framing the composition on the fly is achievable with little probability of error I usually will choose the digital cropping available when utilizing Narrow View as you aren’t restricted by the low frame rates of these resolutions as 1080p Narrow View supports 120fps and 4k only supports a frame rate of 30fps.
Protune settings Video – Protune empowers the user to have manually control over several variables that effect image results.
- Color – This setting offers two options, GoPro Color and Flat. GoPro Color uses the default color profile that is offered when Protune is off and is what I often times shoot as it delivers great results. Flat is a raw color profile offering greater control during post production.
- White Balance – This setting controls what is known as the temperature of an image. With settings ranging between 3000-6500 as well as Auto and Native. The lower the number you use the cooler (more blue toned) your colors will be and the higher number the warmer (more yellow toned) your image will be. I mostly choose AUTO during normal lighting conditions as I’ve found this to achieve the best results however I have found the manual WB settings valuable when shooting long exposures at night to compensate when there is artificial light that is either too warm or too cold.
- ISO – For video I like to keep the ISO at 400 unless the light is low enough that I’m forced to up it. The higher you push the ISO the more light you’ll get but you’ll also start to see noise in the video. So I’ll usually choose to shoot the lower ISO as long as the footage isn’t so dark that it’s unusable and then brighten it in post.
- Exposure Value Compensation (EV) – While I use EV often when shooting photos with the GoPro I rarely use it on the video side unless I’m setting a shot up and there’s too much light and the image looks blown out. For those instances I’ll use the capture app so I have a bigger screen (my phone) and then I’ll dial in the EV to whatever best suits the lighting I’m shooting in.
- Sharpness – There are three levels of sharpness available (Low, Medium, High) As a standard I always shoot sharpness low as I prefer to add sharpness manually in post. However if you don’t do much post work on your video you might want to try Medium or High.
Common Questions
For your pictures do you shoot video and then take screen shots or shoot photos? – All of my stills are shot in photo mode. I only use video mode when shooting video.
How do you keep water spots off your lens? – It may sound funny but the solution is saliva. Water spots are actually caused by the sheet of water on the lens separating. By licking or spitting on the lens and then dipping it right before taking the shot you help to ensure the sheet stays solid and your shot isn’t ruined by spots. Another killer is any specs of sand on the lens. This also will separate the sheet of water giving you those unwanted spots.
What video editing software do you use? – GoPro Studio, Adobe Premiere and After Effects.
What kind of handle do you use? – I use the GoPro 3-Way in small to medium sized surf, when I plan on shooting a time-lapse after my session, when shooting BMX, or landscape. In heavy surf I use the GoPro El Grande extension pole